Prices are a significant factor when selecting machining services all around the world. Prices undoubtedly play a significant role in luring clients, but manufacturers must never forget that quality is just as vital as the asking price. Low pricing may at first draw customers' attention, but over the course of the longest relationships, customers will always choose quality, durability, and Product strength, regardless of how competitive the price you are offering.
For that reason, mostly your European and American clients are focused and expect high quality from Chinese manufacturers so that their products meet international standards. If you are dealing with any well-known company then they must have a separate quality department to ensure these demands. That's why it is always advised that before placing any order, one must inshore that its target company has this kind of department or Any International quality certification.
The standard practice among businesses is to perform a traditional quality control check that comprises a detailed inspection of the manufactured machine product. For the inspection, random samples were picked, and the results were compared to the original design. Most Machinists select CMM or coordinate measuring machines for quality control inspection. The CMM machine checks the final product with the original designs and dimensions. As this CMM process is an after-machining technique this process has some limitations.
Why CMM is not a perfect Choice?
The quality check work comes after the entire production process, which means that if you want any changes or the product is not as per design for any reason, you must restart the process. If you require certain changes, you must conduct additional studies on the specific product. This technique unquestionably raises production costs, lengthens lead times, and diverts the production team's focus. If you are concentrating on a certain design, it might not be a problem, but for mass manufacturing, it is always a hassle. Second, the production department in most machine shops is working on a variety of products. If a batch fails a quality check, the production department will be held accountable. In the meantime, the production team is almost certainly moved on to another project, and they must halt all production to address a previous problem. That's why CMM is not a perfect solution for the manufacturing industry and most industries prefer to implement ON- Machining inspections, this article covers all the pros and cons of on-machining inspection, and why it is the priority of all manufacturing industries.

Why ON-Machining inspection process is the Best one?
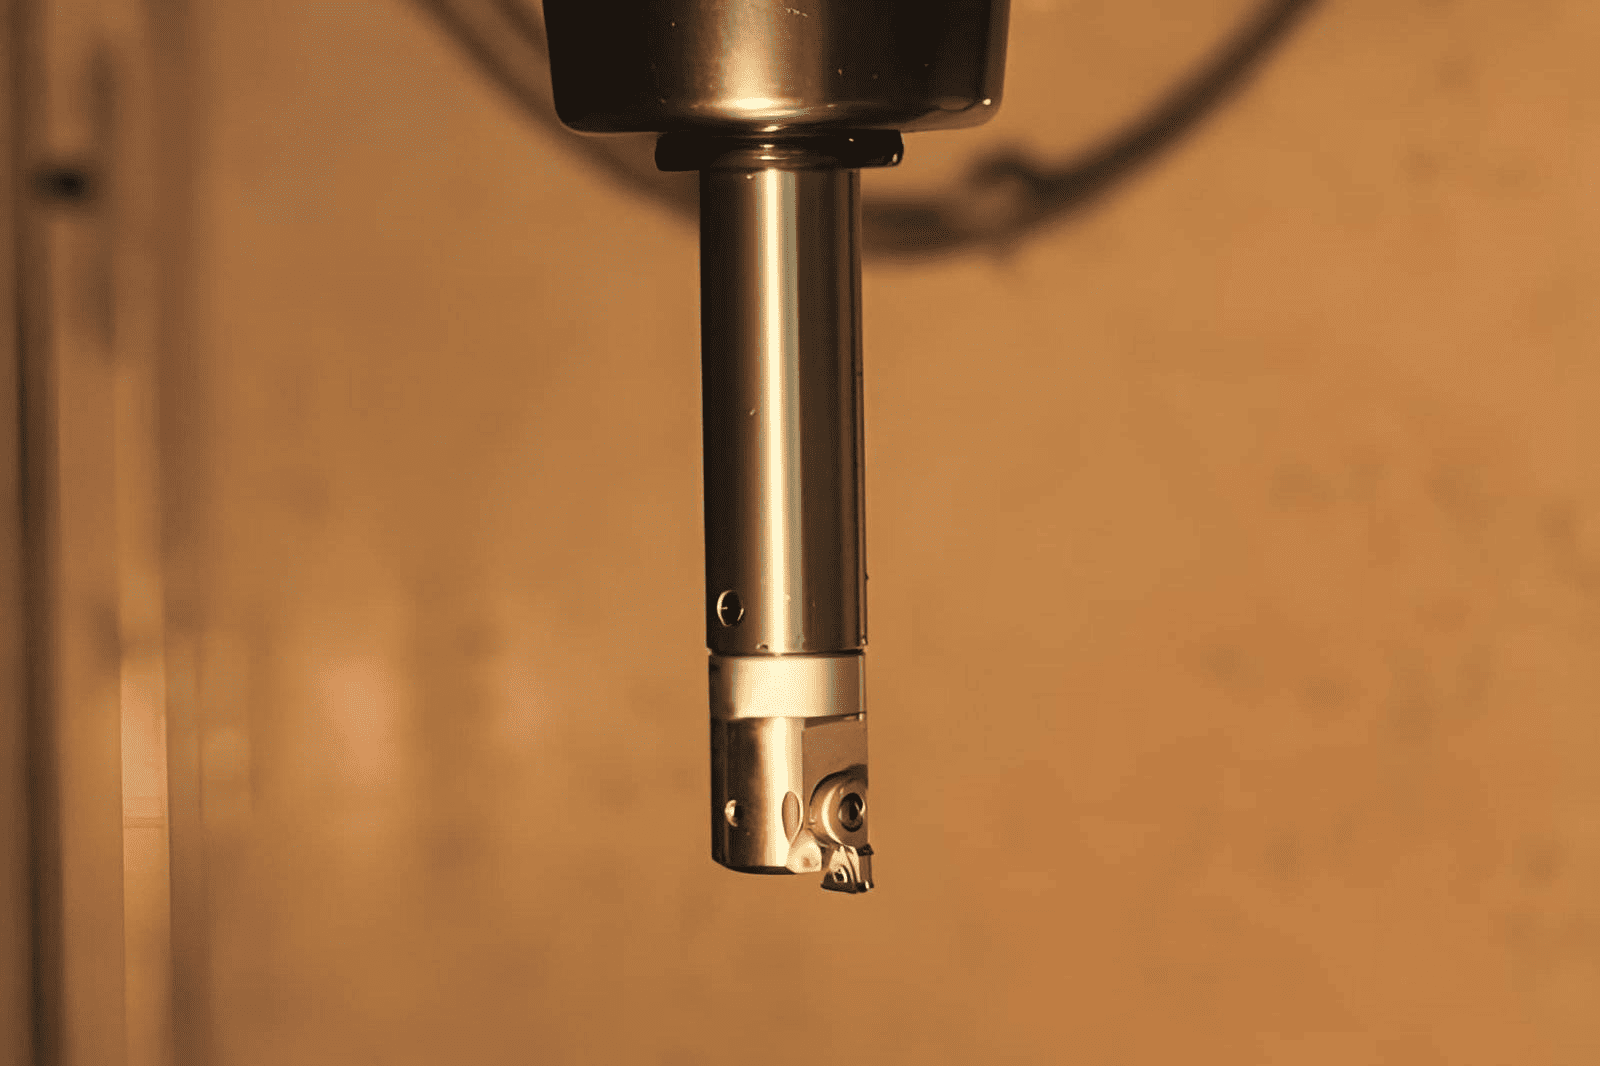
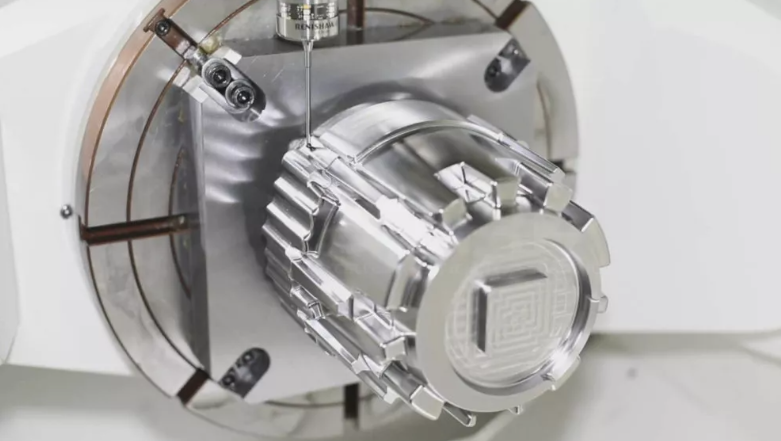
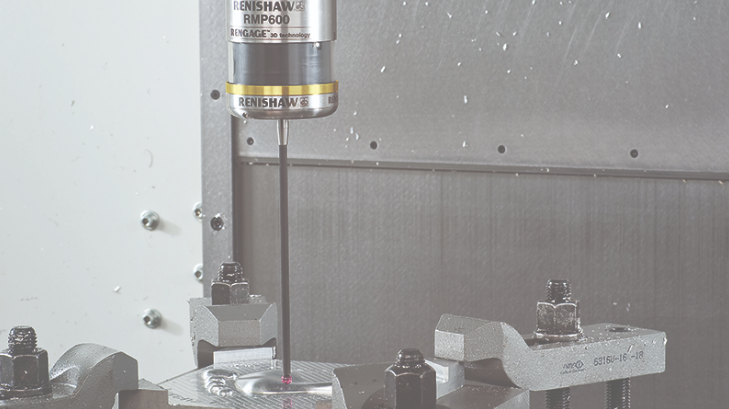
On- machining inspection is defined as inspecting the product on the machine tool, immediately after the machining process, this process does not require separating the workpiece from the working table of the machine. instead of that an automatic tool changer is used to remove the cutting tool and replace it with a tool probe or measurement probe.
The machine just controls the axis of the probe just as it did for the cutting tool, the probe and the machine allow for the maneuvering of the measurement probe to make contact with critical features of the part, the probe just records the coordinates, and do coordinates measurement for precision just as the process is done in CMM.
Slide problem with the on-machine inspection is that defects in the part which are caused by the kinematics errors present in the machine tool, these Kinetic errors are not detected by the measurement probe, For example, if The linear coder shows an error elongation of 0.02 % in x axis’s, it means all features all elongated to such extent, and when the measurement probe encodes its calibration it shows the same elongation in its result, that is something very technical, an experienced machinist knows how to tackle that.
For this reason, it is always recommended for international standards to implement both procedures for quality checks which are.
- On machining inspection
- After machining inspection
You can alter the timing of the machine inspections carried out step-by-step while the product is being manufactured. The first inspection should be performed after 20% competition of the product, the second one after 70% competition, etc. After the machining inspection, a quality inspector must be assigned to evaluate the batch at random for design and durability. Very low risk of variation from the readings exists because on-machine inspection is always carried out. This article goes on to list all the benefits of using this process, which results in high-quality items.

Benefits of on- machining inspection:
Improve efficiency:
Although CMM guarantees high quality and precision, it takes a lot of time to complete, thus in order to achieve high precision and tight tolerance, most manufacturing companies are using both approaches, i.e., implement machining inspection first and then employ CMM.
During on-machine inspection, mostly CNC machines come with a tool probing system this tool problem system is mounted on the machine spindle or the turret. This system is used to identify the mechanical dimensions and set up the workpiece accordingly, which can take up to 10 minutes during manual machining. The prob can perform this application immediately after the machining, even when the workpiece is still on the work table of the machine. The tool probe system also assists in setting the offset as per the dimensions of the 3-D model. As a consequence of this procedure, the Machinist has the option to make any necessary changes or dimensional checks of grooves and cuts, which saves a lot of time when compared to CMM, in which we have to perform all these activities separately, and in result, it definitely increases the production rate.
The best feature of this system is that it continues to operate and monitor the surfaces while not interfering with any other mechanical activity; as a result, by using this technology, the machinist can simultaneously carry out mechanical operations and production inspection.
Since precision is now almost always achieved during machining, the quality inspection team no longer needs to verify the entire batch but may instead check random pieces during on-machining inspections. This is where CMM comes into play. There are far fewer opportunities for rejection as inspections are conducted repeatedly. With tight tolerance and results that are similar to the prototype, this modern quality inspection technique unquestionably ensures highly exact results. It also saves lead time for the company, which defiantly results in increased production and satisfied customers.
Precise mold production:
Implementing the on-machining inspection defiantly able the machinist to achieve more precise results in terms of tolerance and design precision. The tool probe system can identify the workpiece as well as determine part alignment and rotation before cutting. It can automatically realign the cutting tool and start working on the offset cutting, during milling in response to temperature changes. Furthermore, before the part is removed from the CNC machine, the probe can conduct mold-specific functions such as inspecting and validating electrode conditions. Each of these operations overall improves the mold-making process and makes it cheaper, more durable, and highly precise.
Cost Effectiveness:
The major goal for both the client and the business is cost-effectiveness when considering acquiring some machining services. Every business strives to cut back on non-value-added activities, sleep hours, and product costs in order to compete in the global market.
Machine inspection plays a significant role in cost reduction since, like the CMM machine, it doesn't interfere with normal operations and speeds up production. For example, if you believe the precision or cutting length is not up to par, the machinist is aware of all the needs and requirements and may perform a quick operation to address the problem, reducing wasteful material waste and operational costs.
Reduce Lead Time on CMM:
The primary cause of CMM's persistent issues is that it alerts users to any faults at the end of the manufacturing process, making it unable to address these issues by adding more people or machines. This impacts time and raises production costs. In the meantime, most CNC businesses switch the machine to the next project after the product is finished, thus any type of modifications need to stop production. Further, it also diverts the attention of the machinist and the production team.
Furthermore, CMM needs a lot of time for the inspection process, as every product is to be examined by a CMM machine, it can be a headache for bulk orders, where one has to wait in a long queue to examine each part. ON- Machine inspection saves the company from this hectic routine and reduces the burden on CMM machines.
Top 6 reasons why On-machining inspections Lead to Precision Machining
- On-Machining activities make it simple to get rid of specified mistakes that are challenging to spot and fix during the production process. For instance, during machining, machine deflection, tool wear, and machine vibrations all occur.
- On-machining inspections unquestionably result in excellent precision and less scrap and rework. This, as a result, shortens the lead time and maintains high productivity, improving conformity and uniformity of the production process. On-machining inspections undoubtedly improve system capabilities and customer happiness by providing them with state-of-the-art facilities and professional work traceability.
- According to ISO 9001 certification, on-machining inspection produces excellent results during the mold-making process and offers high tolerance and precision. Higher throughput from present assets is incorporated into ON-Machining inspections, which delays capital investment, lowers subcontract and overtime expenses, and facilitates more business without increasing resources.
- An additional advantage of ON-Machining inspection is the automation it brings. By reducing human intervention, ON-Machining inspection improves tool setting, and dimensional accuracy, lowers direct labor costs, and enables the employment of your workforce in more proactive engineering roles. The automated system prevents any manual groove or cut from being made without the necessary calibration, extending the tool's life and minimizing waste.
- Some companies claim that it can waste production time on the machine, but sometimes the cost of a defective product is much higher than implementing some time for on-machine inspection. It prevents the machinist from the bottleneck state of the CMM and ensures uninterrupted processing.
- In industries where high precision is required like Aerospace, avionics, and Defense, implementation of this technique requires some pre-requisite, As the environmental conditions where machining is performed have a markable effect in these cases, maybe the machinist claims high tolerance and precision, but when the part is implemented it shows slite deflection, This is because of environmental factors, thus one should exercise caution because they have a direct impact on on-Machining inspection, notably for these industries, such as humidity, temperature, sticky cutting fluid, and unpredictable swarf.
- For industries where one has to deal with products that are bulky and have a huge dia. For example, in airplanes and naval machinery, these parts are unable to be checked on CMM machines, that’s why machinists have to implement on-machining inspections on them.
Why Baichuan is the Best CNC Machining Company in China?
On machining inspection ultimately reduces lead time and increased productivity while ensuring international standards. If you want to hire an internationally standardized manufacturing company, you can check our website at www.bccncmilling.com.
Beichuan is the leading CNC machihttps://bccncmilling.com/service/ning services provider in China. We are currently having I am more than 2000 square feet of machining shop equipped with all the modern CNC machinery. As we believe in Quality over quantity, we are using modern and internationally standardized quality check techniques. We have a separate quality check professional team that ensures all the standards like ISO 9001 and EASA. Currently, we are working owner a two-way product inspection method that is. ON- Machining Inspection, Pre-Machining, and after-machining inspection.
Because of the following, we can produce the desired designs and dimensions with the lowest lead time, demonstrating cheap production costs and excellent customer satisfaction. You can reach out to us at any time for advice on CNC machining, injection molding, or product development. Our knowledgeable staff will be happy to help.


