

Poor machining sequence leads to scrapped parts, wasted time, and blown budgets. I've seen it happen hundreds of times in our shop when the proper order of operations isn't followed.
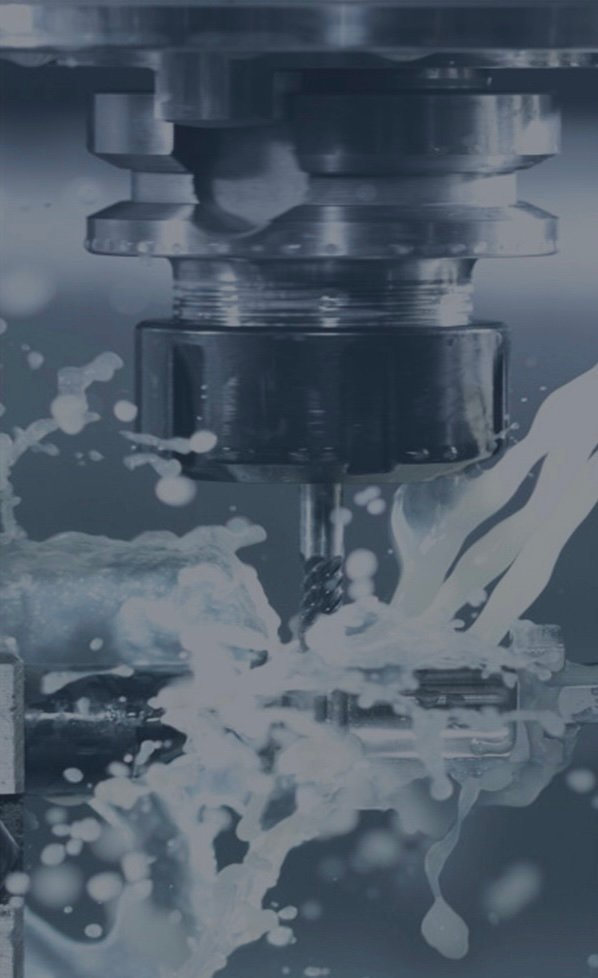
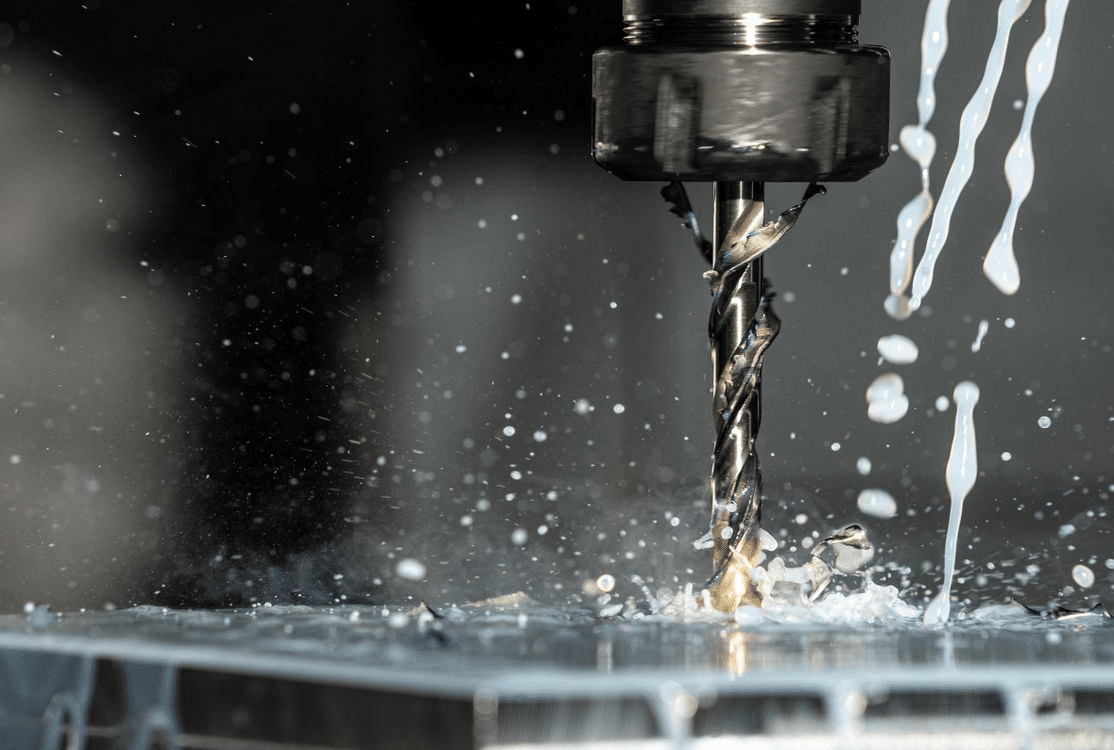
The optimal machining sequence typically moves from rough cutting to semi-finishing to finishing operations. Rough cuts remove bulk material quickly with deeper cuts, while finishing passes use lighter cuts with finer tools to achieve final dimensions and surface quality. This staged approach balances efficiency with accuracy.
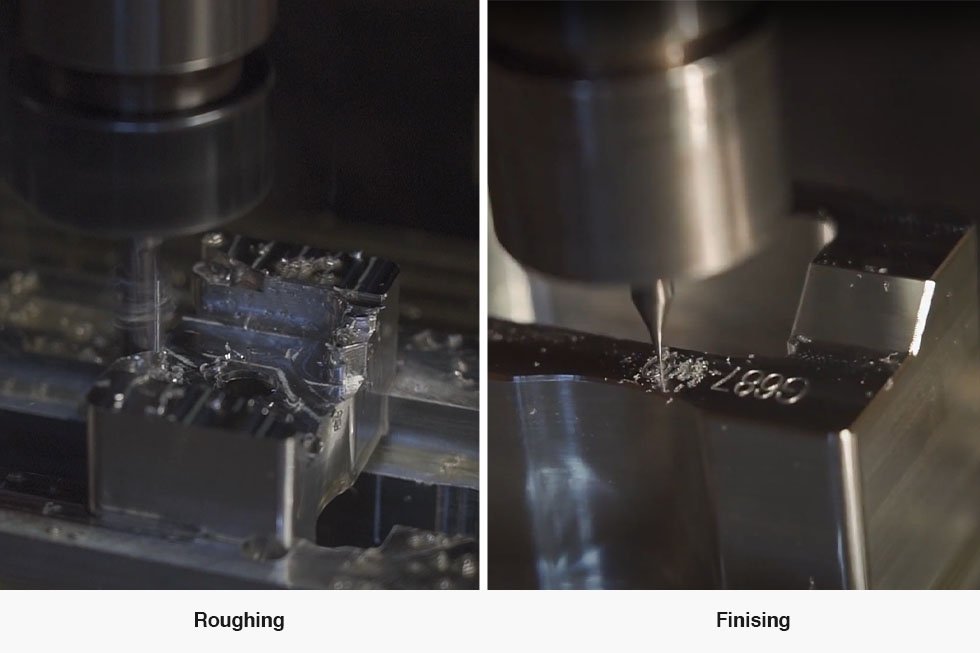
Rough machining operation removing bulk material
After 15 years in CNC manufacturing, I've learned that getting the sequence right isn't just about following a template—it's about understanding the "why" behind each step. Let's explore the critical factors that determine the best machining sequence for your specific parts.
Why Does Machining Sequence Impact Part Quality and Production Costs?
Every time we rush to finish cuts before proper roughing, we end up with dimensional errors and poor surface finish. The wasted materials and rework eat into our profits and delay deliveries.
The machining sequence directly impacts quality because each operation affects the material's internal stresses and geometric stability. Proper sequencing minimizes these effects by strategically removing material to maintain workpiece equilibrium. This approach reduces distortion, improves dimensional accuracy, and optimizes production costs by minimizing tool wear and machining time.
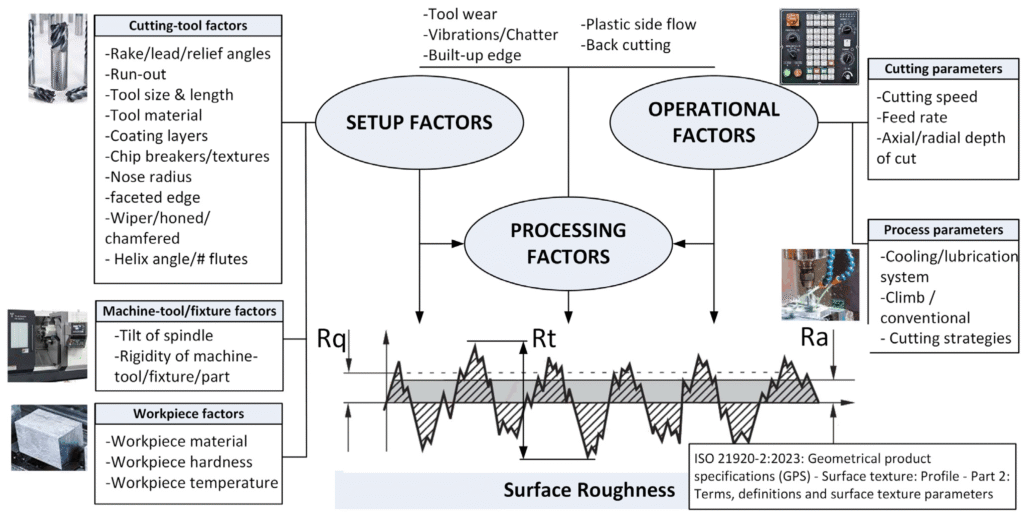
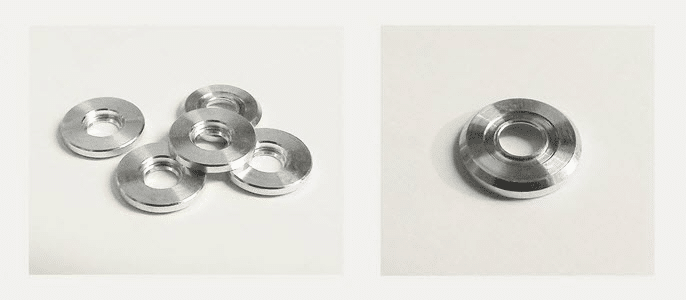
Quality comparison showing the impact of the machining sequence
In our Kunshan facility, we've developed specific sequencing protocols based on years of practical experience. For complex aerospace components, we've found that following a methodical rough-to-finish sequence reduces scrap rates by nearly 40%. This approach considers the part's geometry and anticipated stress patterns during material removal.
When machining complex vacuum chambers, we first perform rough cutting to remove the bulk material, typically leaving 0.5-1mm of material for later operations. This initial step releases the majority of internal stresses while maintaining sufficient material for subsequent operations. Next, we conduct semi-finishing passes that bring the part closer to final dimensions, usually leaving just 0.1-0.2mm. Finally, finishing passes achieve the required dimensions and surface finish.
The cost implications are significant. Improper sequencing often leads to tool breakage, which not only increases tooling costs but also creates unexpected downtime. For a recent automotive component production run, optimizing our machining sequence reduced our total production costs by 22% primarily through reduced tool consumption and faster cycle times.
When Should You Perform Intermediate Operations Between Rough and Finish Passes?
I once rushed a large aluminum sailboat fitting directly from roughing to finishing. The resulting warpage meant we had to scrap an expensive workpiece and start over, missing our delivery date.
Intermediate operations become necessary when working with materials prone to distortion, when machining complex geometries with tight tolerances, or when heat treatment is required. These operations help stabilize the workpiece by allowing internal stresses to normalize before final dimensioning. For critical components, intermediate stress-relieving processes can significantly improve final accuracy.
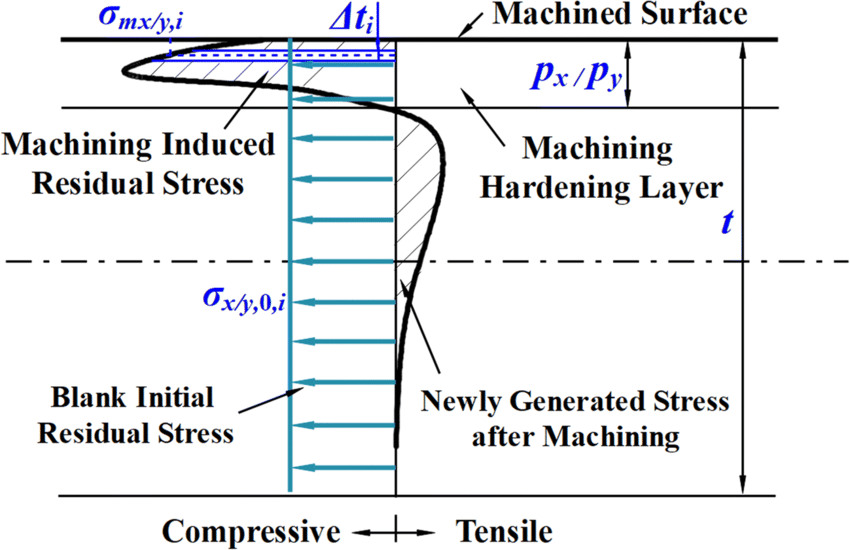
An intermediate stress relief process between machining operations
The decision about when to include intermediate steps depends on several factors that we've learned to recognize over years of manufacturing experience. For high-precision parts, especially those with thin walls or complex geometries, intermediate operations are nearly always beneficial.
When machining large vacuum chamber components with wall thicknesses below 8mm, we always incorporate intermediate stress-relieving operations. After rough cutting, we allow the part to rest for 24-48 hours before semi-finishing. This "rest period" lets internal stresses redistribute naturally, preventing unexpected deformation during final machining. For certain critical components, we sometimes utilize vibration aging—a controlled vibration treatment that accelerates stress relief without thermal processing.
The material removal sequence also plays a crucial role. For complex parts, we've developed a "balanced cutting" approach where material is removed symmetrically from opposing sides of the workpiece. This technique, particularly valuable for large structural components, maintains the part's balance during machining and minimizes deflection.
The time investment in intermediate operations typically pays dividends in reduced scrap rates. For medical device components with tolerances as tight as ±0.01mm, our intermediate inspection and stabilization processes have improved first-pass yield rates from 72% to over 94%.
How Do Different Materials Affect Optimal Machining Sequences?
We learned this lesson the hard way when a stainless steel medical component developed micro-cracks during finishing. The cause? We followed the same sequence we used for aluminum without considering the material differences.
Different materials require tailored machining sequences due to their unique properties, like hardness, thermal conductivity, and internal stress characteristics. Aluminum alloys, known for their thermal expansion, often benefit from multiple passes with cooling periods. Stainless steels, which work-harden rapidly, require careful planning to prevent excessive hardening between operations. Titanium needs specific sequences to manage heat buildup during cutting.
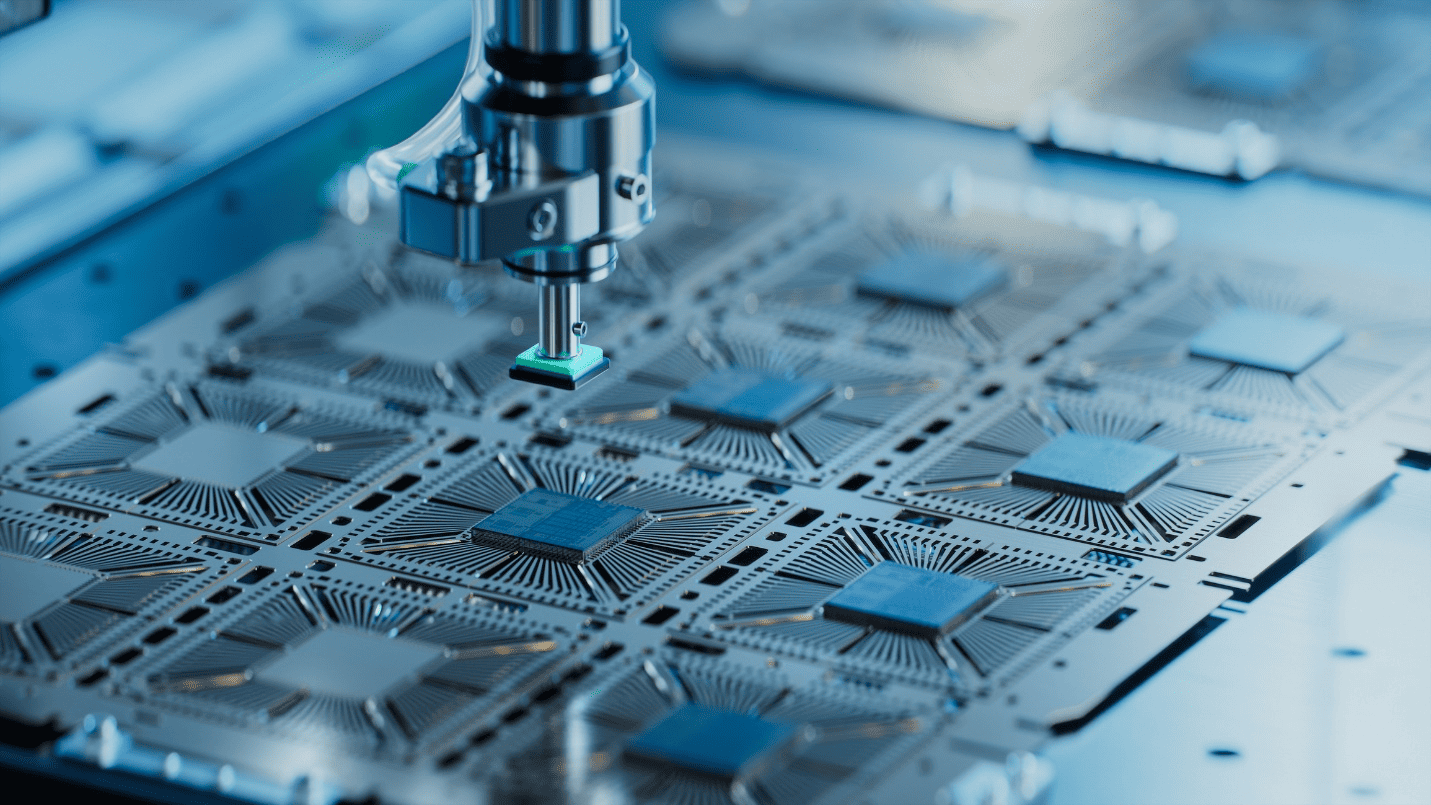
Different materials require specific machining sequences
In our factory, we've developed specific protocols for each material category based on our hands-on experience with thousands of parts. These protocols aren't just theoretical—they're refined through practical application and continuous improvement.
For aluminum components, especially those with thin walls, we implement a "progressive roughing" approach. Instead of removing all excess material in one operation, we remove material in stages of approximately 60%, then 30%, and finally 10% of the total material to be removed. Between each stage, we allow the part to stabilize, sometimes with controlled cooling procedures. This approach has virtually eliminated the warping issues that were once common with our larger aluminum components.
Stainless steel requires a different approach. To prevent work hardening, we minimize the number of passes while maximizing the cutting depth of each pass. Our finishing operations for stainless steel use higher cutting speeds with minimal depth of cut, often with specialized tooling that maintains a consistent cutting edge temperature. For components with particularly tight tolerances, we've introduced cryogenic cooling techniques that have improved dimensional stability by up to 35%.
When working with titanium—a material notorious for its poor thermal conductivity—heat management becomes central to our sequencing decisions. We implement frequent pauses in the machining sequence, use abundant cooling, and often machine multiple parts simultaneously to allow each workpiece to cool while others are being processed. This approach has extended our tool life for titanium components by over 200% while maintaining dimensional accuracy.
What Role Does Tool Selection Play in Machining Sequence Planning?
I once tried using a finishing tool for a roughing operation to save a tool change. The result was a broken $400 tool, four hours of downtime, and a valuable lesson learned about proper tool selection.
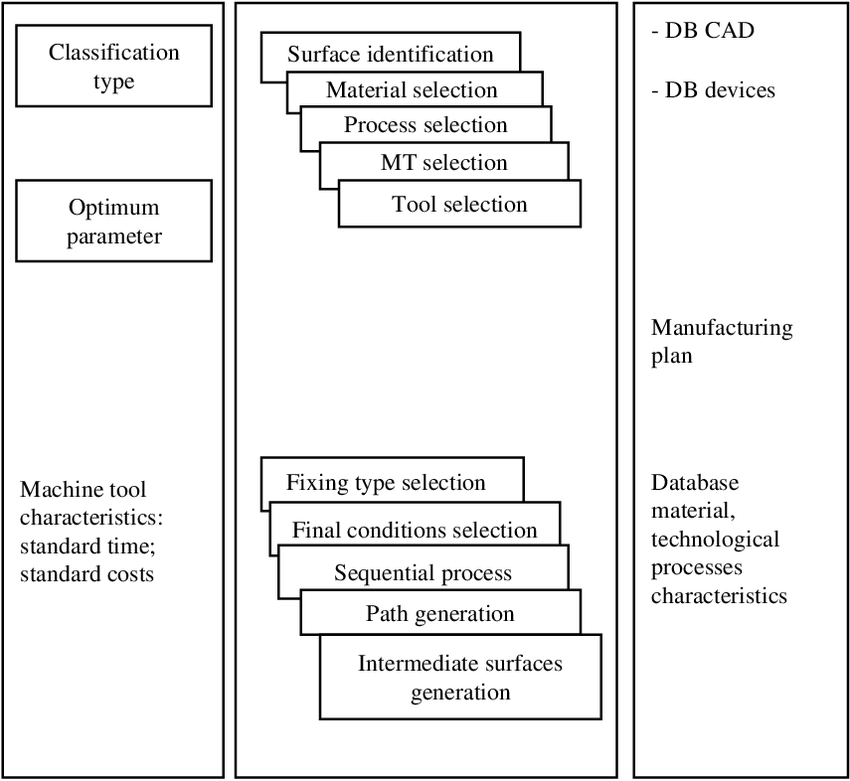
Tool selection critically influences machining sequence planning as each operation demands specific cutting characteristics. Roughing tools are designed for material removal efficiency with robust geometries to withstand heavy cutting forces. Finishing tools prioritize precision and surface quality with sharper edges and specialized coatings. Using the wrong tool at the wrong sequence stage leads to poor results, increased costs, and potential equipment damage.
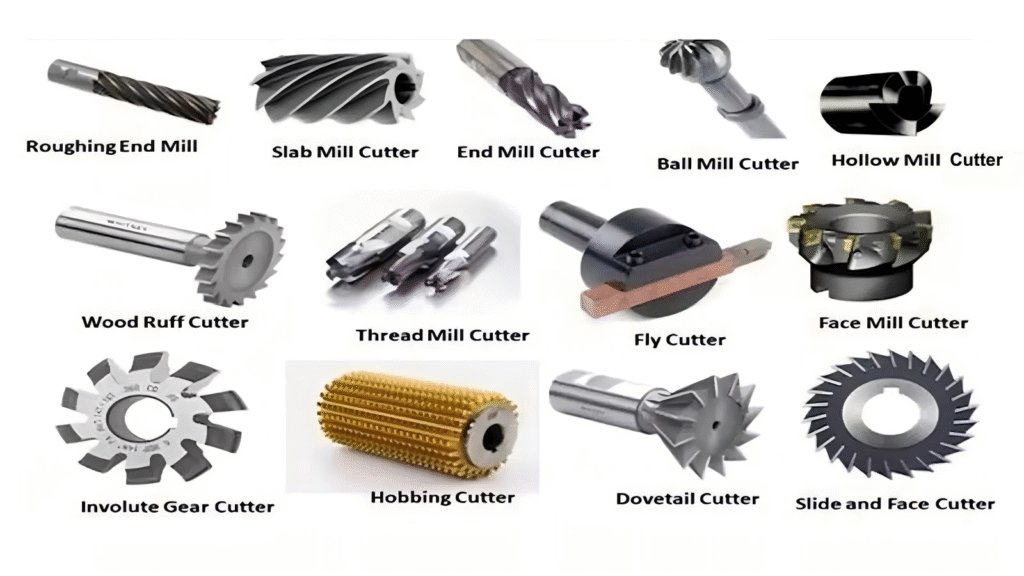
Selection of specialized cutting tools for different machining stages
Through years of practical experience in our machining operations, we've developed a systematic approach to tool selection that directly informs our sequencing decisions. This approach has evolved beyond basic manufacturer recommendations to incorporate our specific production requirements.
For roughing operations, we select tools based on the material removal rate (MRR) and tool longevity balance. In aluminum machining, we've found that carbide end mills with fewer flutes (typically 2-3) maximize chip evacuation during aggressive roughing. However, for stainless steel roughing, we use specialized 4-5 flute tools with variable pitch designs that minimize chatter during heavy cuts. Our tool selection database now contains over 200 specific tool configurations matched to particular materials and operations.
The transition from roughing to semi-finishing presents unique challenges that influence our tool choices. For this intermediate stage, we typically use tools with geometries that balance material removal capability with some surface finish characteristics. Our recent adoption of hybrid tools specifically designed for this transition phase has reduced our overall production time by eliminating certain tool changes while maintaining quality standards.
For finishing operations, our tool selection focuses on achieving the required surface finish while maintaining dimensional accuracy. We've developed a detailed matrix that matches specific surface finish requirements to particular tool geometries, coatings, and cutting parameters. For example, when machining mirror-finish surfaces on stainless steel components, we use diamond-coated tools with specialized edge preparations that virtually eliminate tool marks at properly optimized speeds and feeds.
Tool path planning—which is intimately connected to tool selection—has become increasingly sophisticated in our operations. We now simulate all complex machining sequences before cutting metal, allowing us to optimize tool engagement and minimize areas where tools might experience excessive stress.
Conclusion
Proper sequencing of rough and finish machining operations dramatically impacts part quality, production efficiency, and costs. By understanding material properties, incorporating strategic intermediate steps, and selecting the right tools, you can achieve superior results consistently.